Key Takeaways
- Maintenance Extends Goodman AC Life: Regular cleaning prevents breakdowns and helps your unit run longer and more efficiently. :contentReference[oaicite:0]{index=0}
- Clean Both Indoor and Outdoor Components: Don’t overlook the indoor evaporator coil and drain line, as they impact airflow, air quality, and system performance. :contentReference[oaicite:1]{index=1}
- Simple Steps Prevent Costly Repairs: Clearing debris, straightening fins, and unclogging drains can avoid costly Goodman AC repairs and maintain peak efficiency. :contentReference[oaicite:2]{index=2}
One of the main reasons why air conditioners need to be replaced every so often is not wear and tear. It’s because of all the dirt that accumulates over time. By keeping your Goodman air conditioner well maintained not only will you be extending its life span, you’ll also be saving money on energy bills.
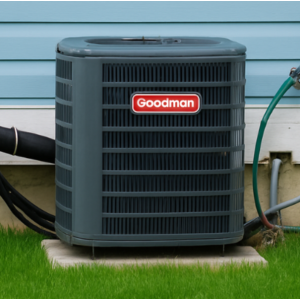
If you want your AC to operate at its highest efficiency, then you’ll need to pay regular attention to it. Below are some tips you can use to keep your AC in tip top condition. These tips are best applied right before a cool season begins. The following DIY tips apply to the entire Goodman air conditioning unit. Every HVAC unit consists of either a furnace and heat pump or AC. No matter the type, they both have an interior and exterior unit. The exterior unit consists of a compressor and condenser coil while the interior unit consists of a blower and an evaporator.
Step 1: Turn The Power Off for your Goodman AC Unit
The last thing any homeowner wants is to get electrocuted while maintaining their Goodman unit, so ensure that you have switched the power before you begin. For the interior unit turn off the power at the breaker box and use the shut-off box to shut off the exterior unit’s power.
Step 2: Remove the Fan Cage
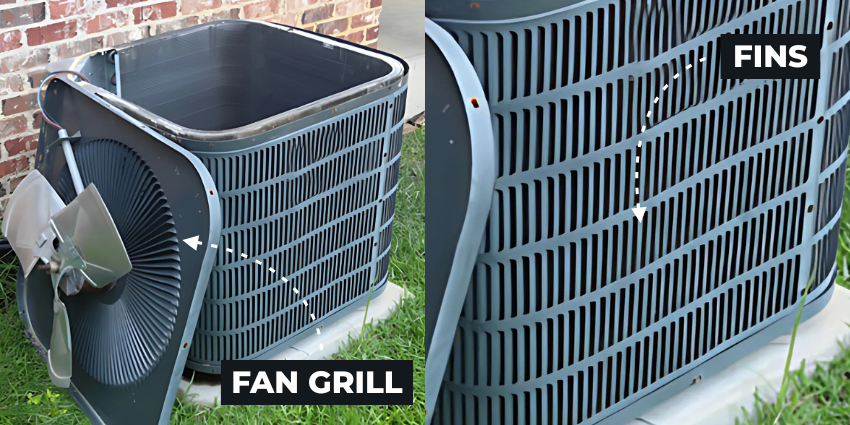
This is where the real maintenance starts. Take off the fan cage that protects Goodman condenser’s exterior unit using a wrench or a screw driver. You will need to remove the fasteners before getting the fan grill or cage out of the way.
Removing Debris from the Unit's Interior
There are a number of ways you could take out the debris from the unit’s interior. You could choose to use either a wet or dry vacuum or you might do it by hand.
Step 3: Cleaning The Fins
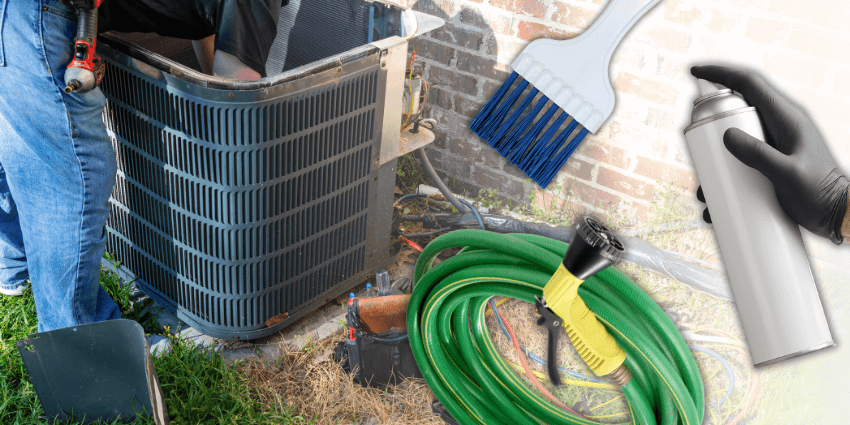
To get rid of all the outside dirt you will need to first remove the unit’s outer covers. Using a powerful shop vacuum’s brush attachment, remove all the outside dirt. Follow this up with a gentle water spray from a garden hose. Take caution not to use a pressure washer as that might damage the unit’s fins. If you think that the fins are particularly dirty and need more attention, you can use a fin cleaning spray which is readily available in most home improvement shops.
Step 4: Straightening The Fins
Sometimes the fins get bent which means that the exterior unit is working at a reduced efficiency. To remedy this you’ll need to carefully use a fin-straightening tool or a butter knife. You need to be super careful when doing this as you wouldn’t want to damage the embedded tubing.
Step 5: Clean The Unit’s Surrounding Area
Once you’re through cleaning your unit, you should clear any brush in the unit’s immediate vicinity as it might hinder air flow to the unit. Do this at least 2 feet in all directions.
Cover Your Goodman Unit During the Winter
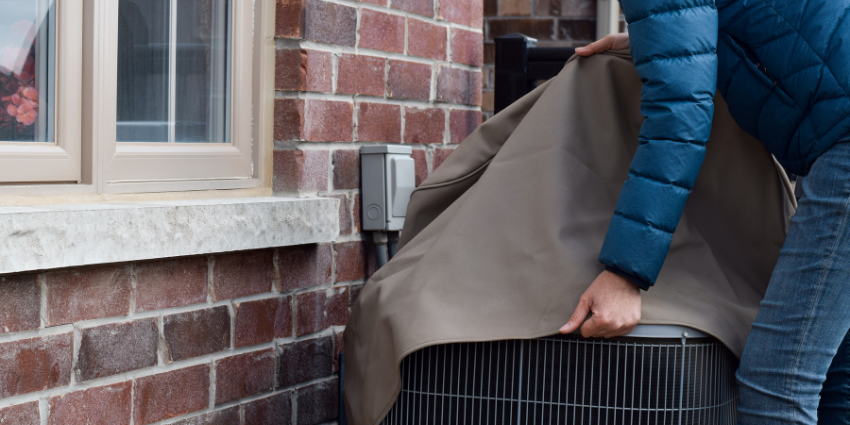
During the winter months, we recommend that you place a plastic or plywood cover on top of the unit to prevent debris from falling in. You shouldn’t completely cover the unit’s side though as it might lead to the build up of moisture which in turn would cause corrosion. The other reason why it’s a bad idea to completely cover the sides is that you might end up with a vermin infestation problem.
Step 6: You Need To Level The Goodman Condenser
Most people don’t know that one of the reasons why the compressor fails early is because the HVAC’s exterior unit does not sit on level ground. You should regularly check to make sure that the pad on which the condenser unit sits isn’t tipping to one side. In leveling the condenser unit, you should use rot-resistant shims. Note that if your heat pump is slightly sloped that shouldn’t be cause for alarm, a sloping heat pump makes an allowance for defrost run-off in winter.
Step 7: Evaporator Coil Cleaning
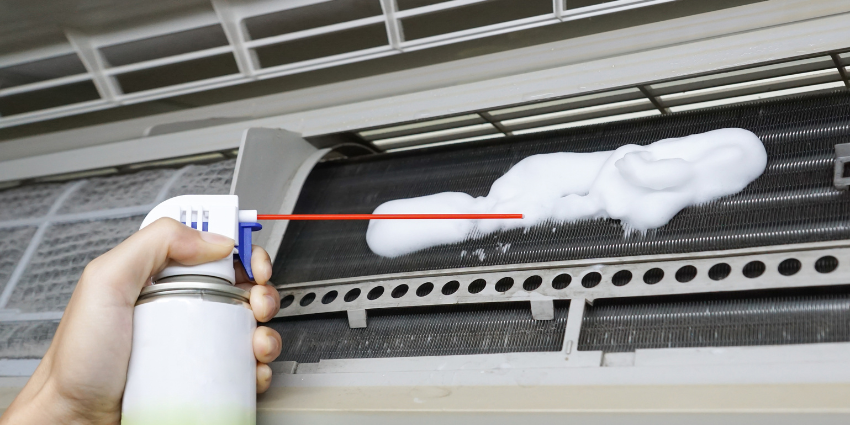
Once you’re through cleaning out the HVAC’s exterior unit, it’s now time to work on the interior portion of your unit. You might need to get some screws and bolts out of the way after finding the evaporator coil door. Next, you’ll need to use a soft brush to get rid of any dust that might have accumulated on the coil. Once that’s done use a no-rinse coil cleaner to spray the coil. The spray foams up and then drips into the drain pan.
Cleaning the Goodman Unit's Drain Pan
Use a mixture of hot water, soap, and bleach to clean the drain pan. Finally, pour a cup of equal parts bleach and water down the drain. To ensure that you drain pan stays cleaner for longer, we recommend that you place a drain pan tablet in the pan. This acts as a measure against algae growth. If you notice that the bleach solution drains easily, you can skip over the next step. However, if it takes time to drain, move to the next step.
Step 8: Clean A Plugged Evaporator Drain
Humid air usually condenses on the evaporator’s cool surface and turns to liquid water which then is exited using a drain tube via a drain pan. From the pan, the water flows into a drain tube which is typically routed into a pan below. Unfortunately, mold and algae can grow over time and plug the pipe which might lead to flooding. You’ll need to use a dry or wet vacuum to clear the drain. Take out the vacuum’s filter first to avoid damage. When cleaning out the pipe you’ll need to create an air tight space around the gap. You can achieve this either by using duct tape or holding a piece of cloth over the gap.
Shop Goodman Air Conditioners at HVACDirect.com
Keeping your Goodman air conditioner clean is one of the simplest—and most effective—ways to boost performance, lower your energy bills, and extend the life of your unit. By powering off safely, clearing debris, straightening and rinsing the fins, cleaning both the outdoor condenser and indoor evaporator coil, unclogging the drain, and making sure your pad is level, you’ll keep airflow and refrigerant flow at peak levels.
These DIY steps should be performed each spring before you switch your AC on for the season—and again in the fall before you shut it down. Don’t forget to swap or wash your air filters regularly, too. For more in-depth diagnostics, refrigerant checks, or any job you’d rather trust to a pro, schedule an annual tune-up with an HVAC technician.
If you ever need genuine Goodman replacement parts, coil cleaner, fin-straightening tools, or accessories, HVACDirect carries everything you need to keep your AC running smoothly. Shop Goodman parts & accessories ›

Key Takeaways
- Maintenance Extends Goodman AC Life: Regular cleaning prevents breakdowns and helps your unit run longer and more efficiently.
- Clean Both Indoor and Outdoor Parts: Don’t overlook the indoor coil and drain—both impact performance and air quality.
- Steps Save Money: Simple upkeep like clearing debris and unclogging drains can prevent costly Goodman AC repairs.
Related Products

Goodman 1.5 Ton 13.4 SEER2 Central Air Conditioner Condenser - R32 Single Stage
Brand: Goodman
Price: $ 1,615.00 (In Stock)

Goodman 5 Ton 14.3 SEER2 Central Air Conditioner Condenser - R32 Single Stage
Brand: Goodman
Price: $ 3,225.00 (In Stock)

Goodman 5 Ton 15.2 SEER2 High Efficiency Central Air Conditioner Condenser - R32 Two Stage
Brand: Goodman
Price: $ 3,851.00 (In Stock)


 If you want your AC to operate at its highest efficiency, then you’ll need to pay regular attention to it. Below are some tips you can use to keep your AC in tip top condition. These tips are best applied right before a cool season begins.
The following DIY tips apply to the entire Goodman air conditioning unit. Every HVAC unit consists of either a furnace and heat pump or AC. No matter the type, they both have an interior and exterior unit. The exterior unit consists of a compressor and condenser coil while the interior unit consists of a blower and an evaporator.
If you want your AC to operate at its highest efficiency, then you’ll need to pay regular attention to it. Below are some tips you can use to keep your AC in tip top condition. These tips are best applied right before a cool season begins.
The following DIY tips apply to the entire Goodman air conditioning unit. Every HVAC unit consists of either a furnace and heat pump or AC. No matter the type, they both have an interior and exterior unit. The exterior unit consists of a compressor and condenser coil while the interior unit consists of a blower and an evaporator.