Key Takeaways
- DIY Mini Splits Are Easy to Install: With pre-charged refrigerant lines and color-coded connectors, DIY mini split systems require no HVAC license and can be set up by most homeowners.
- Efficient Year-Round Comfort: These systems provide both heating and cooling and can maintain full heating capacity in temperatures as low as 5°F, making them ideal for all seasons.
- Save Time and Money: DIY mini splits from HVACDirect.com eliminate the need for a contractor, reducing installation costs and offering a hassle-free solution for garages, additions, and more.
DIY mini-splits are an affordable and easy way to add climate control to your home without a need for a licensed HVAC technician. In this video tutorial, we will show you what to expect when you receive a do it yourself or e-z connect mini split and how to install it in your home or heat and cool a garage or workshop.
How to Install a DIY Mini Split: Step-by-Step Guide Affordable Comfort for Any Space
Looking to heat or cool a room without hiring a professional? A DIY mini split is the perfect solution for homeowners who want to save money and enjoy year-round comfort. Whether it’s an upstairs addition, garage, or workshop, DIY systems are easy to install and designed for efficiency.
Why Choose a DIY Mini Split System
Pre-Charged and Color-Coded Refrigerant Line Sets
At HVACDirect.com, we offer EZ Connect mini split systems that are pre-charged with refrigerant and designed for fast, tool-free installation. With color-coded line sets, setup is straightforward — just connect blue to blue and red to red.
No HVAC License Needed
One of the best parts about a DIY mini split is that you don’t need a licensed HVAC technician to get started. These systems are engineered for simplicity, saving you on both installation costs and time.
What to Expect When You Order a DIY Mini Split
What's in the Box?
Your DIY mini split system will include:
- The outdoor condenser unit
- The indoor air handler
- Pre-charged, color-coded refrigerant line sets
This all-in-one package makes it easy to get your space climate-ready with minimal effort.
How to Install a DIY Mini Split
Step-by-Step Installation Overview
- Choose your system size: For example, an 18,000 BTU unit is ideal for larger rooms or colder climates like Ohio. You can use a mini split sizing guide to help determine what your needs are.
- Mount the indoor unit: Position it securely in the room you want to heat or cool. Be sure to avoid placing it where obstacles might affect air flow.
- Install the outdoor unit: Place it on a flat, stable surface close to the indoor location.
- Connect the lines: Use the pre-charged, color-coded lines to link indoor and outdoor units — no refrigerant handling needed.
- Power up and test: Plug in the unit and use the remote to test heating and cooling functions.
Year-Round Heating and Cooling
Works Even in Freezing Weather
Our DIY systems perform in temperatures as low as 5°F, maintaining 100% heating capacity — perfect for cold climates where reliable performance matters.
Get Your DIY Mini Split at HVACDirect.com
Ready to take control of your comfort? Shop DIY mini splits at HVACDirect.com and enjoy fast shipping, expert support, and unbeatable prices. No license, no hassle — just plug and play comfort.
Related Products

Perfect Aire DIY 12,000 BTU 22 SEER Quick Connect Ductless Mini Split Heat Pump w/ WiFi - 115V
Brand: Perfect Aire
Price: $ 1,279.00 (In Stock)

MRCOOL DIY 25' Quick Connect Line Set for 9k, 12k, and 18k Air Handlers
Brand: MRCOOL
Price: $ 233.00 (In Stock)
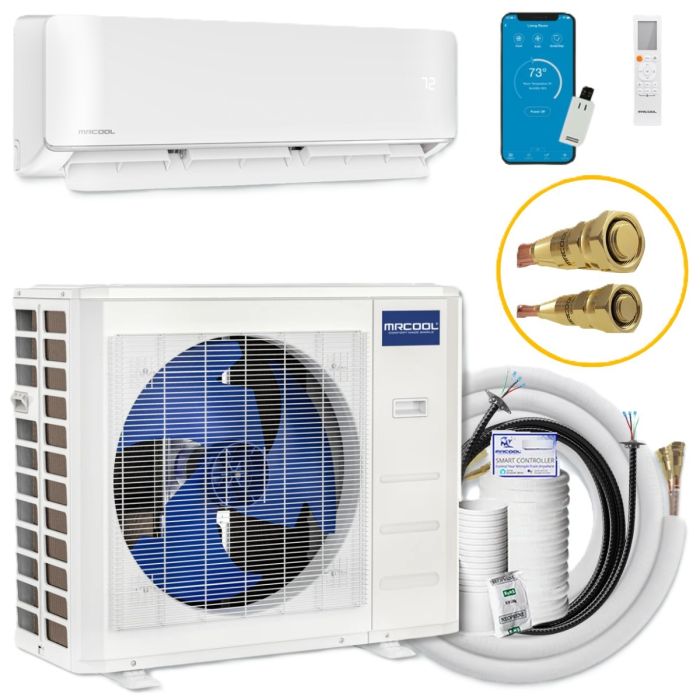
MRCOOL DIY 5th Gen E Star 9,000 BTU Single Zone Mini Split Complete System with 25ft Line Set 115V
Brand: MRCOOL
Price: $ 2,329.00 (In Stock)